Saturday, March 31, 2012

Lemon Bars

Lemon Bars
I decided to make lemon bars after a friend of mine (NICOLE!) made them and said they turned out deliciously! We were even skyping and she just could not stop eating them in front of me (she lives in Switzerland)! So, I asked her for the recipe and decided to have a go at it.  It turned out to be delicious and a hit at our household! It was just the right amount of tang and sweetness. Definitely a good recommendation and I hope you think so too!


Ingredients (12-3inch bars):
-----The Crust-----
cooking spray
1 1/4 sticks unsalted butter
2 cups all-purpose flour
1/4 cup brown sugar
1/2 cup powdered sugar
1/4 tsp salt
-----Filling-----
4 large eggs + 2 egg yolks
1 1/2 cups sugar
1/3 cup all-purpose flour
 1 teaspoon lemon zest
3/4 cup fresh lemon juice (about 4-5 lemons)

Instructions:
1. Preheat oven to 350 degrees.
2. Spray 9x13 inch pan with cooking spray.  Line pan with foil and then spray foil again. 
3. Soften butter in a medium bowl.  Add flour, brown sugar, powdered sugar, and the salt to bowl. Combine until the mixture has a crumbly appearance.
4. Press evenly into the bottom of the 9x13 inch pan.  The crust should come up about 1/2 inch up the sides of the pan.  Make sure there are no cracks in the crust. 
5. Bake the crust for about 25 minutes.
6. For the filling whisk the whole eggs, yolks, sugar, and flour in a medium bowl until smooth.
7. Add in the lemon zest and juice. Mix well.
8. After crust is done reduce the temperature to 300 degrees. 
9. Pour the filling over the warm crust and return to the oven. 
10. Bake for about 30-35 minutes. 
11. Refrigerate bars for at least 2 hours.  I kept mine in for about 3 hours before they were hard enough to cut in to. 
12. Sift powdered sugar over bars before serving.
13. ENJOY!

Friday, March 30, 2012

Baked Balsamic-Soy Asparagus


Baked Balsamic-Soy Asparagus
Hi everyone! Okay, yes I know, I kind of suck for not updating for an entire week! I did cook through out the week (a few things at the least), but I just thought I would wait until the weekend to actually post the recipes. I have just been sooooo busy with no school or work (scarcasm)! I am not sure how I am going to be able to get back into the swing of things after the long break!

Anyways, the first entry of the weekend is a delicious side dish that I love making for the family.  It's got the right amount of garlicy-ness with the right tang from the balsamic vinegar! I absolutely love this side dish, and I am definitely sure that you will too.  Asparagus is also VERY, VERY good for you, which makes this already delicious dish a definite plus! It's low in calories and sodium while being a good source of fiber, Vitamin B, folic acid, etc. All in all, the next time you plan a meal, have this on the side!

Ingredients for the Asparagus
Ingredients (3-4 servings):
1 bunch of asparagus (the skinnier the asparagus the better)
cooking spray
1/4 tsp salt (or to taste)
1/4 tsp pepper (or to taste)
2 scallions (or 1/4 cup onions)
3 cloves garlic
1 1/2 tbsp butter
1 tbsp soy sauce
1 tsp balsamic vinegar

Instructions:
1. Preheat oven to 400 degrees.
2. Cut off about 1 inch of the ends of the asparagus.  This is the thicker and tougher region that is hard to eat.
3. Cut the scallions and mince the garlic.
4. Line the asparagus and coat with cooking spray.  Do this in the tray that you will be baking your asparagus in.
5. Sprinkle the asparagus with the salt and pepper.  Make sure and thoroughly coat all sides of the asparagus with the salt and pepper.
6. Add the scallions and garlic to the top of the asparagus.  You can mix this in as well or just leave on top for the flavor to soak through.
7. Bake asparagus for about 10-12 minutes. (I like them in the more softer side so I keep them in the full 12 minutes.)
8. Melt butter in a sauce pan over medium-heat one minute before asparagus is done.
9. Add soy sauce and balsamic vinegar to sauce pan. Remove from heat.
10. Top the fresh-out-of-the-oven asparagus with the sauce from step 9.
11. Make sure and coat the asparagus all over with the sauce.
12. ENJOY!

Sunday, March 25, 2012

Pineapple Fried Rice

Pineapple Fried Rice
Wow, I am so sorry for a long hiatus! I promised more updates sooner, but I got sick and I was out for a good 3 days with the flu! But I am back! I still have a good couple weeks left before I start my job, so there is still plenty of time left for me to do some good posts! Oh, in my defense, last Sunday I cooked up a feast, but wasn't able to blog about any of it because of being in a hurry and not being able to take pictures! But I did do a lot of cooking, just not for my blog!

I had some company over today and wanted to make a couple things for them. I made Pineapple Fried Rice and also Lemon Bars, which I will be posting about tomorrow! Both turned out delicious, which I do admit were said to me by my company and my family since my tastes buds have yet to recover after my flu! But I will go ahead and trust their judgement since they usually don't lie, especially my dad! Alright, enjoy everyone!

Ingredients for Fried Rice
Ingredients (3-4 servings):
1 cup pineapple pieces
4 cups cooked (Basmati or Jasmine) rice
4 tbsp vegetable oil
2 scallions
1/3 cup onions
3 cloves garlic
1 tsp ginger
2 green chilies
1/4 cup basil leaves
1 egg
1 cup broccoli
-----Stir-Fry Sauce-----
3 tbsp chicken (or vegetable) stock or broth
3 tbsp soy sauce
1/2 tbsp oyster sauce
2 tsp curry powder
1 tsp sugar
-----garnish items (optional)-----
1/8 cup fresh coriander powder
1 scallion
1/4 cup cilantro

Instructions:
1. Chop up the scallions, onions, mince the garlic and ginger, cup up the chilies, basil, and broccoli..
2. Add 1 tbsp of oil to the rice to break up the rice into individual pieces that stand alone.
3. Heat a wok or large frying pan with 3 tbsp of oil on medium-high heat.
4. Add scallions, onions, garlic, ginger, chilies, basil, and broccoli to wok. Stir fry for about 1-2 minutes or until onions become a little transparent. 
5. Move everything in the wok aside and add the eggs.  Cook the eggs like you would when you scramble eggs.
6. In a small bowl, mix together the chicken broth, soy sauce, oyster sauce, curry powder, and sugar until they are will combined.
7. Add the stir-fry sauce to the wok.
8. Add the white rice to the wok and make sure the sauce covers all of the rice. This should only take a couple minutes.  Make sure not to over stir and mix by lifting rice from the bottom and bringing it to the top. Over mixing can cause the rice to become mushy.
9. Add the pineapple pieces to the wok and make sure to mix everything.
10. Do a final taste test.  If rice is not salty enough add more soy sauce, if not spicy enough add more chilies or sriracha sauce, and if too salty add lemon juice. 
11. Garnish the fried rice with coriander powder, scallion, and cilantro.
12. ENJOY!

Saturday, March 17, 2012

Tofu and Rice Noodle Stir-fry

Tofu and Rice Noodle Stir-fry
Hi everyone, I am back!  I am done with finals, done with classes, done with my whole entire undergrad, but more importantly, I have myself a job! Yes, everything fell into place quite nicely and believe me this is very good news for my blog.  This means for the next few weeks (while I relax a bit and wait to start my job) I will be cooking A LOT and trying lots of different things!

So first item that I made for my family was a very nice Asian inspired dish.  I have been making a lot of desserts so I thought I should make some main dishes.  This turned out really good and even the kiddies liked it.  And I don't know about you, but I love me my TOFU! Oh and the best part is this dish is very healthy, low-fat and takes about 30 minutes total to make! :D

Ingredients for Stir-fry
Ingredients (5-7 servings):
8 oz. rice stick noodles
1.5 cup cubed tofu (firm, extra firm, or stir fried tofu works)
2 tsp cornstarch
3 tbsp soy sauce
1 tsp ginger
1 tsp garlic
1/2 cup red onion
2 red bell pepper
2 1/2 tbsp vegetable or canola oil
1/2 cup chicken stock (or vegetarian stock)
3 cups bean sprouts
-----for stir-fry sauce-----
2 tbsp soy sauce
1 tbsp fish sauce
1 tsp sugar
1 tbsp lime juice
1/4 cup chicken stock (or vegetarian stock)
-----for garnishing items (optional)-----
1 tsp coriander powder
1/2 cup bean sprouts
1/2 cup scallions
1/2 cilantro
sriracha sauce to taste

Instructions:
1. Place a pot on the stove top with 3 cups of water on high heat.  Once water is hot, lower heat to medium-low and let rice sticks soak for about 10 minutes or until they are soft, but still a bit firm.  Once they are done, drain the water and wash noodles with cold water.
2. Mix together all the stir-fry sauce ingredients: soy sauce, fish sauce, sugar, lime juice, and chicken stock.
3. Cut the tofu into cubes.  If using fried tofu, you will not have to do this.  (I think fried tofu would have been a better option for this dish just because the tofu is very delicate. Still delicious though!)
4. Stir together the cornstarch and soy sauce and pour over the tofu.  Let marinade for about 5 minutes.
5. Mince the ginger and garlic.  Cut the red peppers and onions into strips.
6. Heat a wok or a large frying pan with oil.
7. Once oil is hot, add the tofu with all the marinade along with the garlic and ginger.
8. Once marinade has reduced or tofu mixture has become dry, add a few tablespoons of chicken stock every time wok starts to get dry.  Stir until the stock has reduced and then more tablespoons of stock.  Keep adding tablespoons of stock at a time until all chicken stock is done.
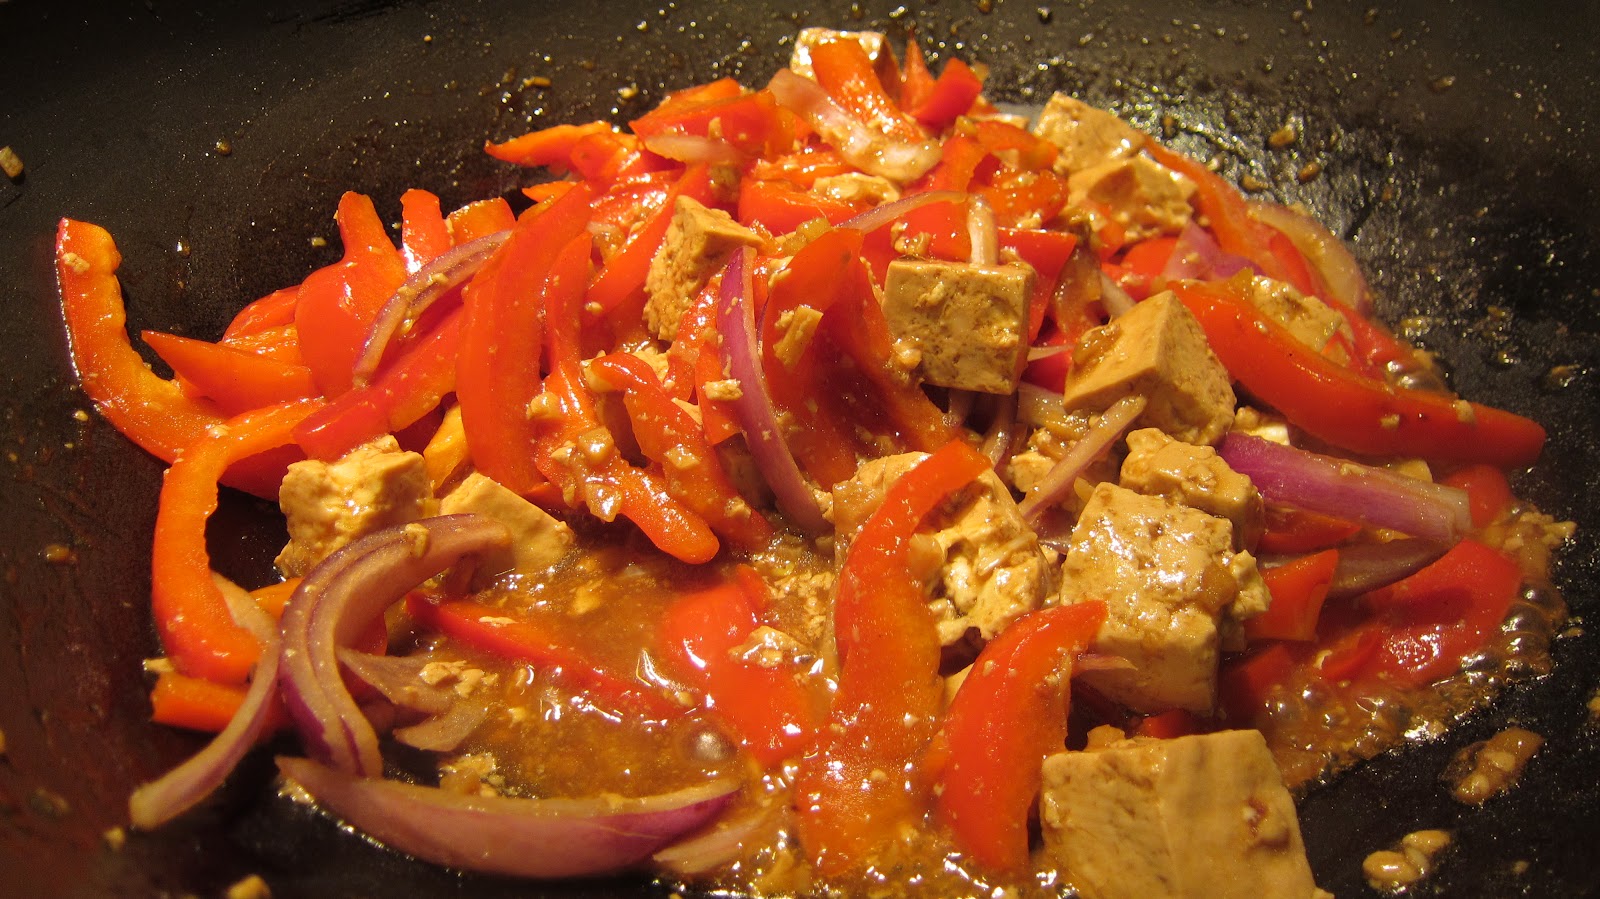
9. Add the red peppers and onions to the wok and stir for about 2-3 minutes.
10. Add the rice noodles and stir-fry sauce to the wok.
11. Toss everything together in the wok like you would a salad, making sure to evenly coat the rice noodles.
12. Add the bean sprouts and toss again.
13. Remove from heat, and taste. Add 1 tbsp of fish sauce or soy sauce if not salty enough. If too salty, add another squeeze of lime juice.
14. Place on serving plate and sprinkle coriander power on top.
15. Garnish with bean sprouts, scallions, and cilantro.  Add a lime slice and sriracha on the side.
16. ENJOY!

Friday, March 9, 2012

Super Soft Sugar Cookies

Super Soft Sugar Cookies
Hi everyone, so my blog as been a little slow this couple weeks just due to the craziness of school and job hunting, but I promise once things start settling down a bit, I will make more creative and fun stuff again.  I just kind of made this for a birthday that I went to a while back.  It was also Veteren's Day hence the blue and red! Anyways, these turned out great and SUPER soft.  Probably the softest sugar cookies I have ever made from scratch!  Give it a try and comment to let me know what you think!  FYI, credit goes to twopeasandtheir.com for this yummy recipe!

Ingredients (make about 2-3 dozen cookies):
3 cups flour
1/2 tsp baking powder
1/2 tsp baking soda
1/4 tsp salt
1/2 cup butter
1 cup sugar
2 small eggs
1/2 tsp vanilla extract
3/4 cup sour cream
-----for buttercream frosting-----
1/2 cup butter
1/2 tsp vanilla extract
2 cups powdered sugar
pinch of salt
3 tbsp heavy whipping cream
food coloring (optional)
sprinkles (optional)

Instructions:
1. In a large bowl, sift together the flour, baking powder, baking soda, and salt.
2. In a separate bowl, cream together the butter and sugar with a mixer at a medium speed.  The mixture should be fluffy to indicate it is done.
3. Add the eggs one at a time.  Beat until the whole mixture is well combined.
4. Add the vanilla extract and sour cream and beat on low speed until whole mixture is well combined.
5. Slowly add the dry ingredients from step 1 into the wet ingredients in step 4.  Mix on low until the entire mixture is well combined. (As a precaution, the dough does tend to get a bit sticky, but that is how it's suppose to be so don't worry).
6. Flatten dough into a square or rectangles that are about 1.5 inches thick, wrap it in plastic wrap and place in refrigerator for at least 2 hours.
7. After at least 2 hours has passed, preheat oven to 425 degrees.
8. Flour a clean surface that you will be handling the dough on.  Roll out the dough with a pin until it's about 1/4 inch thick.
9. Using cookie cutters, make fun shapes.
10. Place cookie on cookie sheet.
11. Bake cookies for about 6-7 minutes.  The cookies should be a nice and golden color, indicating that they are done.
12. Cool cookies for about 30 minutes before you frost them.
13. To make the frosting, cream together the butter and the vanilla extract with a mixer on low.
14. Slowly add in the powdered sugar and pinch of salt until all has been incorporated.
15. Slowly add in the heavy whipping cream. (At this point you would add the food coloring and make sure that the color has been beaten into the entire mixture.)
16. The cookies should be cooled so then you are ready to decorate them however you wish to. The frosting should set in about a few hours making the transportation of the cookies mess-free!
17. ENJOY!

Friday, March 2, 2012

Pineapple Upside Down Cake

Pineapple Upside Down Cake
It was my mother's "fake" birthday (long story, don't ask) and I wanted to bake her something that she hasn't had before.  I do not usually bake cakes, I am more of a bread, cookies, muffin type of girl, but cakes are also fun to make.  This cake, although a bit sweet for my liking, was a pretty big hit in my household.  It was gone the next day!  I have made some adjustments to what I made, less sugar and what not, but it should still turn out very good! Pretty certain it's something you haven't tried making yourself yet.  I was also fairly surprised at how easy it was to make! Anyways, try it out and see what you think!

Ingredients (about 6-8 servings):
3 tbsp butter (I used smart balance to stay healthy!)
1/2 cup light brown sugar
1 14-20 oz can pineapple slices
1 12 oz can maraschino cherries (without stems)
1/3 cup vegetable shortening
3/4 cup sugar
1 egg
1 1/2 tsp vanilla
1 3/4 cups flour
3 tsp baking powder
1/2 tsp salt
3/4 cup milk

Instructions:
1. Preheat oven to 350 degrees.
2. Melt 3 tablespoons of butter in a 8x8 (or 9x9) square pan by placing it in the hot oven for about 3 minutes or until all butter is melted.
3. Sprinkle brown sugar over pan evenly.
4. Arrange pineapple slices on top of brown sugar, add a cherry in the middle of each slice.  (You can be as creative with your design of the placement of the fruits as you want.  I ended up using only 6 pineapple slices and 9 cherries.)
5. In a medium bowl, cream the shortening and sugar.
6. Add in the egg and vanilla.
7. In a small separate bowl, sift the flour, baking powder, and salt together.
8. Add half of the dry ingredients to the wet ingredients (mixture from step 7 in mixture from step 5/6). Beat for about 10-15 seconds.
9. Add half the milk into overall mixture. Just stir enough combine.
10. Add remaining dry ingredients.  Beat again for about 10-15 seconds.
11. Add in remaining milk.  Stir enough to make sure the entire mixture is well combined and there are no big lumps anywhere.
12. Pour mixture over the pineapple and cherry arrangement.
13. Bake for about 45-55 minutes.  When inserting a toothpick into the middle of the cake, the toothpick should come out clean, indicating that it's done.  If not keep in the open for a few more minutes.
14. As soon as cake is done, take the serving plate, and place it on top of cake.  Turn the cake upside down onto the serving plare and leave for a about a minute.  Take off the square pan. (If any of the pieces of fruits happen to come off, just place them right back on!)
15. ENJOY!
Happy Birthday Ma!