Showing posts with label Cheesecakes. Show all posts

Tuesday, July 3, 2012

Cheesecake Yogurt Cupcakes with Strawberries and Blueberries


Cheesecake Yogurt Cupcakes with Strawberries and Blueberries


It has been over a month since I have blogged! I feel so terrible about it! I need to get back to the rhythm.  I have been cooking, but I am always rushed and do not have the time to take pictures and record the process.  But I am going to try to find my routine of cooking again!  I am back at it and I hope that I can keep my promise of updating at least once a week. 

It’s been a crazy couple months, with starting my new job and getting into the groove of everything.  I love how my schedule is and having evenings and weekends free of everything.  It’s also wedding season with my friends which makes my extra time filled with wedding festivities! Life is good J

Okay back to the cooking! Tomorrow is Fourth of July, and I thought as a way to celebrate that I would post a red, white, and blue inspired recipe! I made this a while ago, but it was very yummy and I can’t wait to make it again.  I only made 12, but I feel as if the less amount I make of something, the bigger the hit it is in my household! Anyways, have to thank SkinnyTaste for this marvelous recipe! Try it out and I promise even though it may be low calorie, it will not disappoint!

Ingredients for Cupcakes
Ingredients (12 cupcakes):
12 vanilla wafers
8 oz 1/3 less fat cream cheese
1/4 cup sugar
1 tsp vanilla extract
6 oz fat-free vanilla Greek yogurt
2 large egg whites
1 tbsp flour
8 oz strawberries
8 oz blueberries

Instructions:
1. Preheat oven to 350 degrees.
2. Place a vanilla wafer at the bottom of each cupcake liner.

3. Gently beat, with an electric mixer on low speed, the cream cheese, sugar, and vanilla extract until smooth.
4. Slowly add in the yogurt, egg whites, and flour to the mixture in step 3.  Make sure and beat until everything is incorporated, but do not overbeat.
5. Pour mixture from step 4 into each cupcake liner, only filling the liner halfway.
6. Bake for about 20-25 minutes, until the center is set and does not move.
7. Cool for at least 20 minutes before refrigerating it for at least an hour.

8.  Cut off the tops of strawberries and slice them.
9. After the cupcakes have cooled, top with fresh strawberries and blueberries. (Optional: I had some marshmallow sugar glaze that I had made which I also put on top of the cupcakes and fruits, but this is not needed!)
10. ENJOY!

Sunday, April 29, 2012

Chocolate Chip Cheesecake

Chocolate Chip Cheesecake
I am finally back from my long, LONG vacation!  It was such a well needed break from everything and a vacation that I will remember for the rest of my life! But now it's time to get back to losing and gaining calories on a more healthier and routine basis (aka exercising and cooking). And I promise that my updates will be more consistent and not all over the place.  Let's just say April was just a fluke because of my vacation.  So unless I am sick, on vacation, or busy with work, expect updates!

Okay so I made this cheesecake a while ago before going on vacation, but didn't get a chance to blog about.  It turned out really good, and we happen to have guests that day, that were also pretty impressed by it.  This is also a much lighter version of your average cheesecake (LESS CALORIES), with having cut down on the cream cheese and adding greek yogurt instead.  The chocolate chucks also gives this recipe the exact amount of sweetness without being too sweet.  Anyways, give it a try and I promise you wont be disappointed!

Ingredients for Cheesecake

Ingredients (6-8 servings)
non-stick cooking/baking spray
-----crust-----
1/2 cup crushed graham crackers 
1 tbsp light butter
2 1/2 tbsp unsweetened cocoa powder
-----cheesecake filling-----
8 oz package of reduced fat cream cheese (1/3 fat also works)
1/4 cup sugar
6 oz fat-free vanilla Greek yogurt (I used Chobani, but others work too)
1/2 tsp vanilla extract
2 egg whites
2 1/2 tbsp unsweetened cocoa powder
1 tbsp flour
1/8 cup of chopped chocolate chips
(less than) 1/8 cup chocolate syrup

Instructions:
1. Heat oven to 350 degrees.
2. Spray an 8x8 baking pan with non-stick spray.
3. Crush graham crackers (I used a blender, but a food processor or any such item would work).
4. Mix graham cracker crumbs, butter, and cocoa powder until crumbs are evenly moistened with the butter.
5. Press graham cracker crumbs evenly onto the bottom of the baking pan creating the crust.
6. Gently beat together, with an electric mixer on low, the cream cheese, sugar, and vanilla until it's smooth.
7. Add the yogurt, egg whites, cocoa powder, flour, and chocolate chips just enough so that it's incorporated in.  Make sure not to over beat.
8. Pour over graham cracker crust.
9. Drop chocolate syrup by spoonfuls on top of the cheesecake filling.
10. Using a knife, make swirl pattern to create the marble effect.
11. Place in the oven for about 30 minutes.  When taking it out and moving it around, the filling should not wiggle very much.
12. Cool to room temperature.  Chill in the refrigerator for a few hours before serving.
13. ENJOY!

Friday, February 3, 2012

Red Velvet Cheesecake Brownies

Red Velvet Cheesecake Brownies
How many of you knew that Red Velvet was just chocolate cake with a TON of red food coloring?  I tell this to people and they just can't understand then why it tastes so GOOD and different.  Well people, I really can't tell you either. Anyways, I was baking for some friends and wasn't quite sure what to bake them.  I decided to try this new recipe that I have been meaning to get my hands dirty with.  Cheesecake? YUM. Red Velvet?  Double YUM. Brownies? SOLD! So that's was why I chose to bake these little pieces of heaven.

All credits for this amazing recipe must go to Doughmesstic, who I wasn't too familiar with.  But after this, I will definitely be sure to check out her blogs more often!  A bit of advice,  I was so in a rush to cut these brownies up that I didn't allow them to cool down all the way before hand, because of this, my slices weren't very clean and came out crumbly.  I would definitely wait at least an hour before cutting up these brownies.  Another side note, these were probably the best brownies I have EVER had.  This will definitely be my brownie mix from now on.  10x better than the box mix! Alright on with the recipe!


Ingredients for Brownies

Ingredients (makes about 16-20 brownies):
non-stick baking spray
9 Tbsp butter
3 ounce semisweet chocolate chips
1 1/4 cup sugar
2 large eggs
2 tsp vanilla extract
1/4 tsp red food color powder (you can also use 3 oz of red food color)
1 tbsp warm water (if you use the liquid food coloring, you won't need this)
3/4 cup All Purpose Flour
1/4 tsp salt
2 tbsp Unsweetened Cocoa Powder
-----Cheesecake Layer-----
1/3 cup sugar
8 oz package of reduced fat cream cheese (1/3 fat also works)
pinch salt
1 large egg
2 tsp vanilla extract

Instructions:
1. Preheat oven to 350 degrees. 
2. Spray 8x8 baking pan with non-stick baking spray.  
3. In the microwave, melt chocolate and butter until smooth.  This should take about 30-45 seconds.  Set aside.  
4. In another bowl cream together eggs, vanilla, and sugar. 
5. Mix together the red food color with the warm water.  Add the food coloring to the wet mixture (step4).
6. Add in chocolate and butter mixture (step 3) until well combined.
7. In small bowl, sift together cocoa, salt, and flour. 
8. Add mixture (step 6) to the wet ingredients (step 5). Make sure and just combine and not over mix.
9.  Pour batter into sprayed baking pan.
10. Beat softened cream cheese, 1/3 cup sugar, pinch of salt, egg, and vanilla extract together until smooth. 
Unbeatened cheesecake
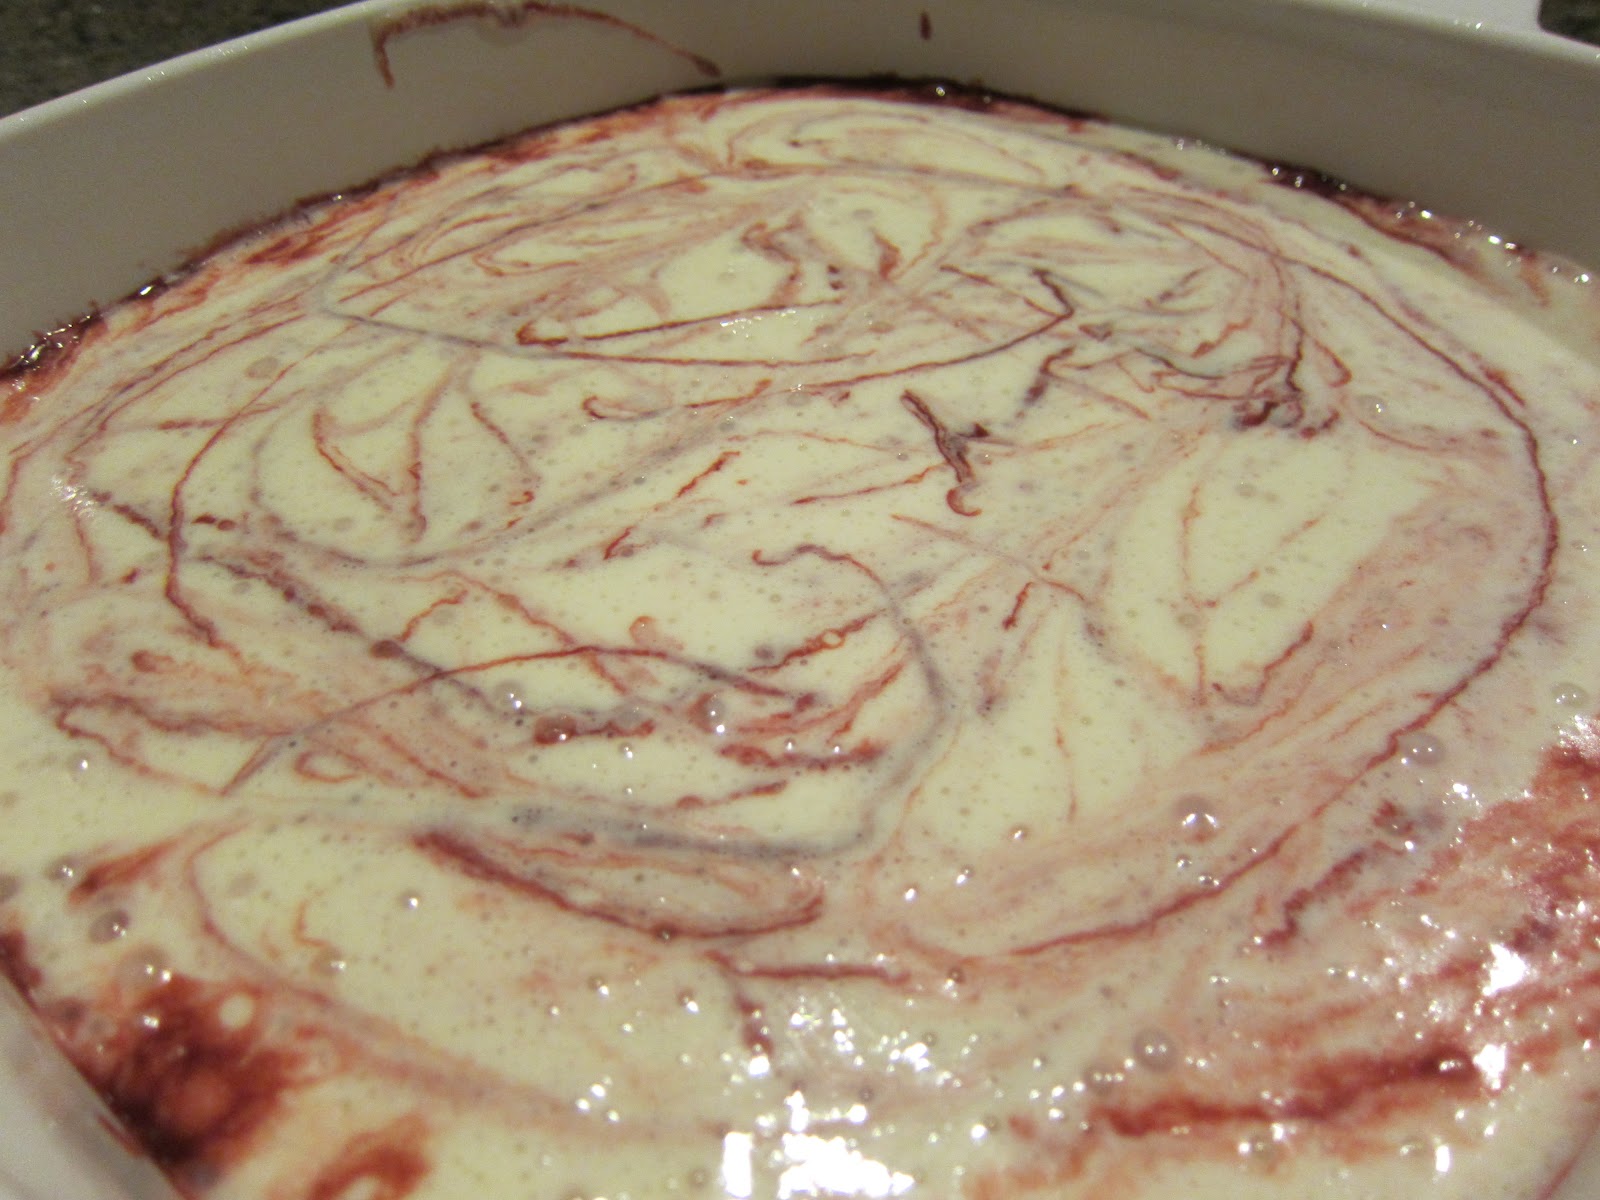
11. Pour over brownie batter. Don't worry they won't mix together. 
12. Use a sharp knife to swirl together to create a pattern on top.
13. Bake for 1 hour 10 minutes.  You will know it's done when you insert a toothpick and it comes out clean.  
14. ENJOY!

Friday, January 27, 2012

Blackberry Cheesecake

 Blackberry Cheesecake
Do you love cheesecake, but hate the guilty feeling afterwards?  I know I LOVE cheesecake, but I always feel like I need to eat it while running on the treadmill! Well, with this recipe, guess what, you won't have to feel at all guilty! It's very light, and still SUPER delicious.  I got the original idea from Skinnytaste.com, but went ahead and put my own spin on it.  I made this last weekend, and believe me it was DEVOURED in just about one night.  And most of it by kids under the age of 7.  One thing to be aware of is, depending on what kind of preserves you use, it might turn out a bit on the tart side.  If you like it a bit on the sweeter side, try using strawberry preserves, or just adding a bit more sugar.  I loved it just how it was, but that's because I love all things tart! Alright enough with the typing, and on with the recipe!

Ingredients for Cheesecake
Ingredients (6-8 servings)
non-stick cooking/baking spray
1/2 cup crushed graham crackers 
1 tbsp light butter
8 oz package of reduced fat cream cheese (1/3 fat also works)
1/4 cup sugar
6 oz fat-free vanilla Greek yogurt (I used Chobani, but others work too)
2 egg whites
2 tbsp lemon juice (roughly half a lemon)
1/2 tsp vanilla extract
1 tbsp flour
1/4 cup seedless blackberry preserves (jelly or jam works as well)

Instructions:
1. Heat oven to 350 degrees.
2. Spray an 8x8 baking pan with non-stick spray.
3. Crush graham crackers (I used a blender, but a food processor or any such item would work).
4. Mix graham cracker crumbs and butter until crumbs are evenly moistened with the butter.
5. Press graham cracker crumbs evenly onto the bottom of the baking pan creating the crust.
Graham Cracker Crust
6. Gently beat together, with an electric mixer, the cream cheese, sugar, and vanilla until it's smooth.
7. Add the yogurt, egg whites, lemon juice, and flour just enough so that it's incorporated in.
8. Pour over graham cracker crust.
9. In a small bowl, stir preserves until liquidly. Drop by spoonfuls on top of the cheesecake filling.
10. Using a knife, make swirl pattern to create the marble effect.
11. Place in the over for about 30 minutes.  When taking it out and moving it around, the filling should not wiggle very much.
12. Cool to room temperature.  Chill in the refrigerator for a few hours before serving.
13. ENJOY!